


The physical surfaces surrounding a property often serve as the unsung heroes of a building’s overall integrity and aesthetic appeal. Whether it is the path leading to a front door, the expansive area where employees park, or the structural slab supporting heavy machinery, the ground we walk and drive on is the first physical interaction anyone has with a space. Unfortunately, these surfaces are frequently overlooked until significant problems arise. The hidden costs of ignoring deteriorating surfaces can be staggering, ranging from tripping hazards that invite liability, to vehicle damage caused by severe rutting, to drastically lowered property values and poor curb appeal.
Investing the time to understand material properties, installation best practices, and the underlying science of structural support will save property owners thousands of dollars and decades of frustration. This comprehensive guide provides actionable strategies for selecting the right materials, overseeing proper installation, and implementing rigorous maintenance routines. By shifting from a reactive approach to a proactive mindset, property managers and homeowners alike can ensure their exterior spaces remain safe, functional, and visually striking for years to come.
Evaluate Soil Stability and Design a Strategic Drainage Plan Before Digging

A finished surface is only ever as strong as the foundation upon which it rests. Before pouring a single yard of material or rolling out a fresh layer of aggregate, a thorough evaluation of the subgrade—the native soil beneath the project site—is absolutely critical. Different soils behave in vastly different ways when exposed to moisture and load-bearing stress. Expansive clay soils, for instance, absorb water like a sponge, swelling during heavy rains and shrinking dramatically during dry spells. This constant shifting creates a volatile environment that can easily crack even the thickest surface layers. Conversely, sandy soils may drain well but often lack the necessary cohesion to support heavy, concentrated loads without rutting or displacing.
When beginning a new project, property owners must ensure that the excavation process removes organic topsoil and reaches a stable subgrade layer. From there, a properly engineered aggregate base course must be installed and compacted. In cases where the native soil is particularly poor, incorporating a geogrid—a synthetic mesh laid over the soil before the gravel base is added—can significantly improve structural stability by distributing heavy loads over a wider area. When you are scoping out reliable paving services, it is highly recommended to ask the project manager exactly how their crew handles subgrade preparation, as this unseen step dictates the entire lifespan of the project.
Equally important to the soil composition is the strategic management of water. Standing water is the ultimate enemy of any hardscape. To prevent water damage, the surface must be designed with a precise slope, also known as the pitch, to direct runoff away from building foundations and high-traffic zones. The industry standard generally requires a minimum slope of two percent, which translates to a drop of one-quarter inch per foot of distance. If the natural topography of the land does not allow for adequate sloping, subsurface drainage solutions must be integrated into the design. Installing French drains alongside the perimeter or placing catch basins in inevitable low spots will actively channel water away from the vulnerable base layers. Vetting a local paving company by checking their past projects for proper water runoff handling after heavy rainfall is a prudent step in the hiring process.
-
Subgrade Checklist: Always demand a soil compaction test before the base aggregate is laid.
-
Drainage Non-Negotiables: Ensure downspouts from the roof do not empty directly onto newly laid surfaces without a clear, sloped path for the water to escape.
-
Base Materials: Specify crushed stone with sharp, angular edges for the base layer, as round river rock will not lock together tightly under pressure.
Select the Correct Mix and Mandate Strict Compaction Standards for Flexible Surfaces
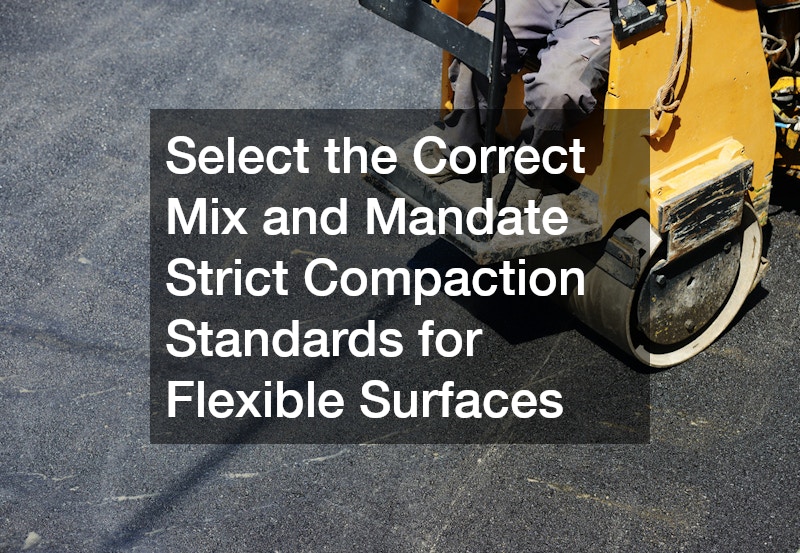
When dealing with flexible pavement solutions, tailoring the material composition to the specific demands of the environment is paramount. Asphalt is not a one-size-fits-all product; it is a meticulously engineered combination of varying sizes of aggregate (stone, sand, and gravel) bound together by a viscous petroleum-based cement. The specific mix design used for a project must reflect the anticipated traffic volume and vehicle weight. For instance, a heavy-duty commercial loading dock requires a coarse-grade mix featuring large aggregate stones, which provide exceptional load-bearing strength and resistance to heavy truck tires. Conversely, pedestrian walkways or residential areas benefit from a finer-grade mix, which results in a smoother, more aesthetically pleasing finish that is easier to walk on and sweep.
Understanding these mix variations is vital for residential projects. Installing a new asphalt driveway requires a mix tailored specifically to the weight of the homeowner’s vehicles to prevent premature rutting and structural fatigue. A standard residential installation typically consists of a compacted aggregate base of four to six inches, followed by a binder course, and topped with a finer surface course. If a homeowner owns heavy equipment, an RV, or multiple large SUVs, communicating this to the contractor ensures the base depth and mix grade are adjusted accordingly.
The installation phase itself is a race against time and temperature. The material must be delivered and laid while it is still extremely hot—usually between 275 and 300 degrees Fahrenheit. If it cools too much before being compacted, it becomes stiff, making it impossible to achieve the necessary density. Proper compaction is what removes air voids from the material; too many air voids will allow water to infiltrate the surface, leading to rapid deterioration. The crew must use heavy vibratory rollers to compress the material systematically. Gathering detailed quotes from multiple asphalt paving companies is a critical step to ensure the chosen contractor owns well-maintained, heavy-duty compaction equipment and employs experienced operators who understand the intricate timing of the rolling process.
-
Temperature Monitoring: Reputable crews will continuously check the temperature of the material upon delivery and during the rolling phase using infrared thermometers.
-
Edge Compaction: Pay close attention to the edges of the pavement, as these are the most vulnerable to crumbling. Proper techniques include using a hand tamp or a specialized edge-compacting tool.
-
Curing Time: While the surface can typically handle foot traffic within a few hours, vehicles should be kept off for at least 24 to 48 hours, and steering wheels should not be turned while the vehicle is stationary for several weeks to prevent tire scuffing.
Establish a Routine Crack-Filling Schedule and Protect Against UV Damage
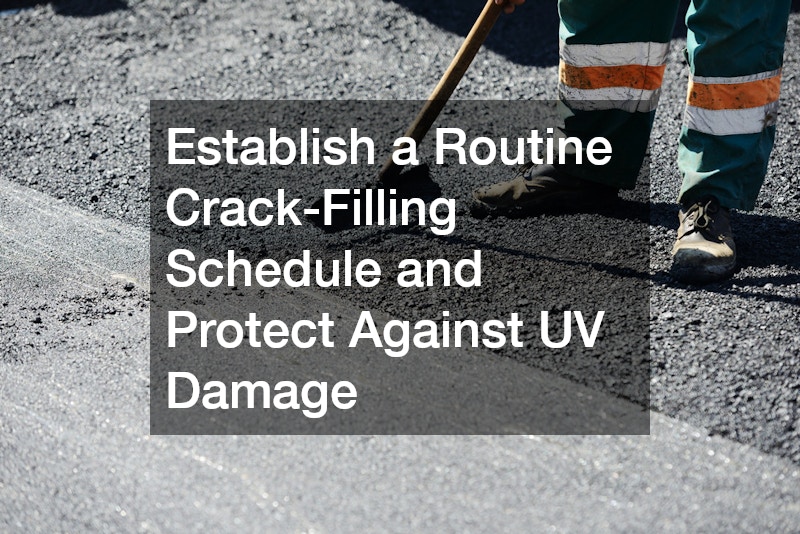
The long-term viability of any outdoor surface relies heavily on a proactive, non-negotiable preventative maintenance routine. Environmental elements are relentless; ultraviolet rays from the sun oxidize materials, causing them to become brittle and lose their flexibility, while extreme temperature fluctuations cause continuous expansion and contraction. The most critical aspect of maintenance is moisture control, and the first line of defense is a rigorous crack-filling schedule.
Water that infiltrates through surface cracks can wash away the underlying base material, creating voids that eventually collapse under the weight of a vehicle, forming potholes. In colder climates, water trapped in cracks freezes and expands, tearing the surface apart from the inside out. Property owners should make a habit of visually inspecting their surfaces every spring and fall. A practical rule of thumb is that any crack wider than a quarter of an inch needs immediate attention. For temporary, minor repairs, cold-pour fillers available at hardware stores can offer a quick fix. However, for permanent, durable repairs, hot-rubberized crack sealing is required. This professional-grade material flexes with the surface as it expands and contracts. Professional paving contractors often recommend annual inspections before the winter freeze-thaw cycle begins, or before the heavy rainy season, to identify and seal vulnerabilities.
Beyond addressing structural fractures, the surface itself needs a protective barrier against the elements and chemical spills. Vehicle fluids, such as motor oil, gasoline, and antifreeze, act as solvents that actively dissolve petroleum-based surfaces, leading to soft spots and rapid degradation. Applying a protective coating acts as a shield against these harsh chemicals and blocks out oxidizing UV rays. This is not a task that should be done immediately after installation; the surface needs time to cure and shed excess surface oils, which typically takes six to twelve months. Understanding the step-by-step process of commercial parking lot sealcoating helps property owners appreciate its value: the surface must be meticulously cleaned of all debris and grease, cracks must be routed and filled, and the coating must be applied evenly, often using a squeegee machine for deep penetration followed by a spray coat for a uniform finish. This process should ideally be repeated every two to three years depending on traffic volume.
-
Thorough Cleaning is Key: Sealants will not adhere to dirt. Power washing and using stiff-bristled brooms are mandatory before any protective layer is applied.
-
Oil Spot Treatment: Existing oil stains must be treated with a specialized primer before coating, otherwise, the oil will bleed through the new finish.
-
Weather Conditions: Protective coatings require dry, sunny conditions to cure properly. Applying them when rain is in the forecast or temperatures are below 50 degrees Fahrenheit will result in failure.
Incorporate Proper Reinforcement and Strategically Place Control Joints for High-Load Zones

When a project demands uncompromising rigidity and the ability to withstand immense static loads, shifting from flexible materials to rigid slabs is the optimal engineering choice. Concrete is exceptional under compressive stress—meaning it can support an enormous amount of downward weight—but it is inherently weak under tensile stress, meaning it can easily pull apart or crack when subjected to bending forces. To counteract this natural deficiency, incorporating proper structural reinforcement is mandatory.
The type of reinforcement used depends entirely on the intended use of the slab. For heavy-duty commercial applications, such as dumpster pads or loading zones, a grid of steel rebar is essential. The rebar acts as the skeleton of the slab, holding the material together even if the ground beneath shifts slightly. For a standard residential concrete driveway, a grid of welded wire mesh or the addition of synthetic micro-fibers mixed directly into the batch can provide sufficient tensile strength to handle everyday passenger vehicles. A residential slab should ideally be poured at least four inches thick, but property owners should seriously consider upgrading to a five or six-inch thickness if they anticipate parking heavy RVs, boats, or heavy-duty work trucks. The difference in material cost is negligible compared to the cost of tearing out and replacing a fractured slab.
Another fundamental characteristic of rigid slabs is that they shrink as they cure and dry. This natural shrinkage creates internal stress that will inevitably cause cracking. To manage this, professionals strategically place control joints (also known as contraction joints) to dictate exactly where the slab will crack. By scoring a straight, clean line into the surface, you are creating a weakened plane; when the tension builds, the slab cracks neatly down inside the joint rather than branching randomly across the surface. The mathematical rule of thumb for joint spacing is to multiply the slab thickness in inches by 2.5 to determine the maximum joint spacing in feet. For example, a four-inch slab should have joints spaced no more than ten feet apart. Suggesting an interview with potential concrete contractors about their jointing strategy before signing a contract is an excellent way to ensure they proactively manage natural shrinkage cracks and understand structural engineering principles.
-
Proper Curing is Crucial: The chemical reaction that gives rigid slabs their strength requires moisture. Implementing a wet cure (keeping the surface damp with sprinklers or wet burlap for seven days) or applying a chemical curing compound significantly increases the final strength.
-
Expansion Joints: Unlike control joints, expansion joints are placed where the slab meets an existing structure (like a foundation wall or a sidewalk) to allow for thermal expansion without causing buckling.
-
Subgrade for Rigid Slabs: Just like flexible surfaces, a compacted gravel base is required. Pouring directly over dirt is a recipe for catastrophic failure.
Coordinate Surface Textures with Architectural Styles and Apply Quality Sealers

Upgrading a property’s exterior does not mean sacrificing structural durability for aesthetic appeal. High-traffic areas can be transformed into stunning architectural focal points through the use of decorative techniques that offer both functionality and beauty. The key is to coordinate the surface textures and colors with the existing architectural style of the building, creating a cohesive and inviting environment.
Modern advancements in hardscape finishing allow for an incredible variety of aesthetic options. Property owners can choose subtle upgrades, such as a broom finish with a decorative troweled border, or opt for complex transformations. One highly sought-after method involves impressing three-dimensional patterns into the surface while it is still in its plastic state. This technique, commonly known as stamped concrete, can meticulously mimic the upscale look of natural slate, rustic cobblestone, weathered wood planks, or classic brick. The major advantage here is that property owners achieve the luxurious appearance of individual paving stones at a fraction of the cost, while also eliminating the maintenance nightmare of weeds growing through countless mortar joints. When selecting a pattern, consider the building’s facade: an ashlar slate pattern pairs beautifully with modern, clean lines, while a European fan cobblestone pattern complements traditional or historic architecture.
To preserve the vibrant colors and intricate textures of decorative surfaces, applying and maintaining a high-quality, UV-resistant sealer is an absolute necessity. Unsealed decorative surfaces will rapidly fade under the sun and are highly susceptible to staining from leaves, dirt, and tire marks. There are generally two categories of sealers to choose from. Penetrating sealers soak deeply into the pores, offering invisible protection against moisture and chemical intrusion without altering the surface appearance or making it slippery. Film-forming sealers, such as acrylics or polyurethanes, sit on top of the surface, creating a protective barrier that often enhances the colors and provides a glossy or satin finish. For long-lasting results, it is highly recommended to source commercial-grade sealers directly from reputable concrete suppliers rather than relying on watered-down, lower-grade alternatives typically found at big-box home improvement stores.
-
Slip Resistance: Film-forming sealers can become incredibly slippery when wet. Always mix a granular anti-slip additive (like aluminum oxide or specialized polymer grit) into the final coat of sealer on walkways and sloped areas.
-
Color Fastness: When choosing colors, integral coloring (where the pigment is mixed directly into the truck before pouring) offers a more uniform and fade-resistant base compared to top-cast color hardeners alone.
-
Maintenance Resealing: Decorative surfaces should be gently power-washed and resealed every two to three years to maintain their protective barrier and visual depth.
Conclusion
The surfaces surrounding your home or business are much more than mere pathways; they are complex structural systems that require careful planning, precise engineering, and dedicated upkeep. From the initial excavation and subgrade stabilization to the final application of a protective topcoat, every step in the paving process plays a vital role in determining the longevity and safety of the installation. Ensuring proper water drainage and choosing a material thickness suited for your specific traffic loads will prevent the vast majority of common surface failures.
By adopting a proactive approach to maintenance—such as adhering to a strict crack-filling schedule and utilizing high-quality protective sealants—property owners can drastically extend the lifespan of their investments, avoiding disruptive and costly total replacements. Whether you are aiming to enhance the welcoming aesthetic of a suburban residence or fortify the heavy-duty infrastructure of a commercial facility, informed decision-making is your best tool. Audit your current surfaces today for minor vulnerabilities, address drainage flaws before the rainy season arrives, and consult with experienced professionals to map out a long-term strategy for your property.